First month, first game. For this month I’ve decided to remake http://cakebysadiesmith.co.uk/radio.php Lunar Lander. Why did I chose this? Well, because it’s simple and addictive game. I think the fact that I’ve wasted hours/days of my childhood playing it (Just like all the other games I’m planning to do this year) may have helped towards choosing this game.
I started, as I usually do, with programming the most important object, the player’s ship. I first created a simple movie clip with a basic image of space ship and attached a new class file to it. In the new class file I programmed in a simple key listener for allowing the player to rotate and thrust the ship. After flying the ship around I decided the next step was to add in the collision checks. These first checks were simple ones; if the player flies off either the left or right side of the screen they should reappear on the opposite side with the same velocity and if the player tries to go off the bottom or top of the screen they simply just get pushed back. Now I’m left with a ship that can fly endlessly around the screen. Seeing as buy gabapentin 100mg uk lunar lander is based on the moon and not in space, this just simply wouldn’t happen. I sorted this issue by adding resistance to the ships position update, a max velocity and obviously gravity to the ship.

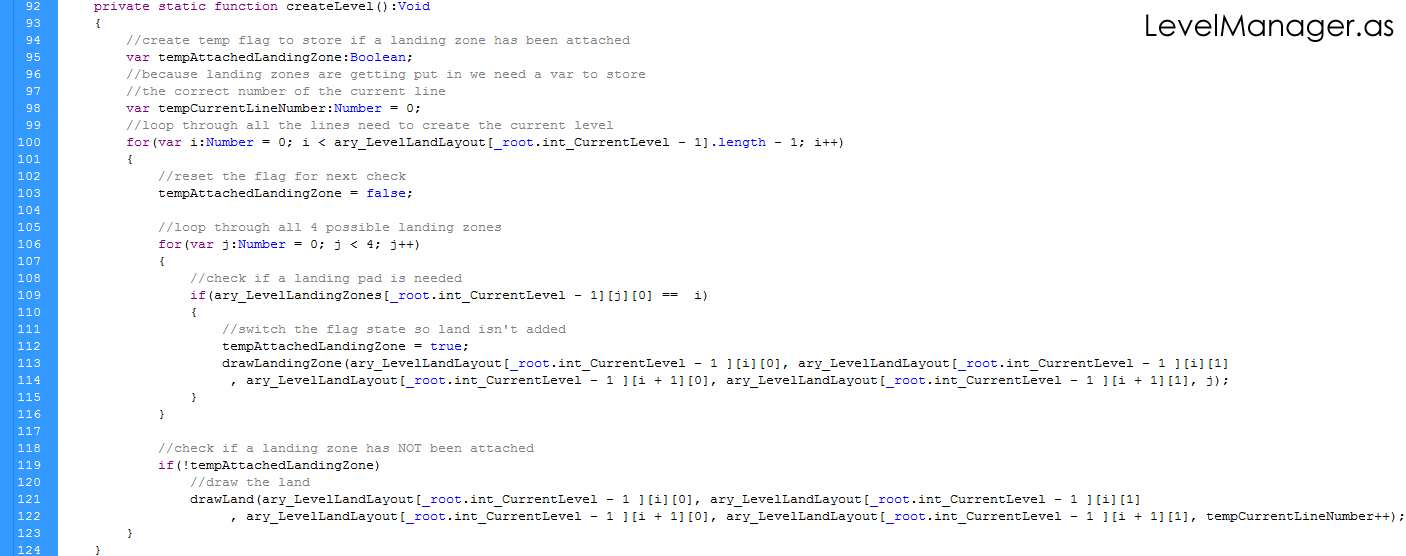
With the basics of the ship done I next moved on to setting up the landscape for the ship to crash and land on. I first thought about having separate movie clips for each level but the collision checking would become far too complex so instead I opted for drawing the level using an array of coordinates. This works by drawing a line between two coords and placing it in an empty movie clip. When the loop is setting up the level there’s a check to see if a landing pad needs to be drawn. The positions of the landing zones for each level are stored in another array. LevelManager.as handles all these function for creating and destroying the level.
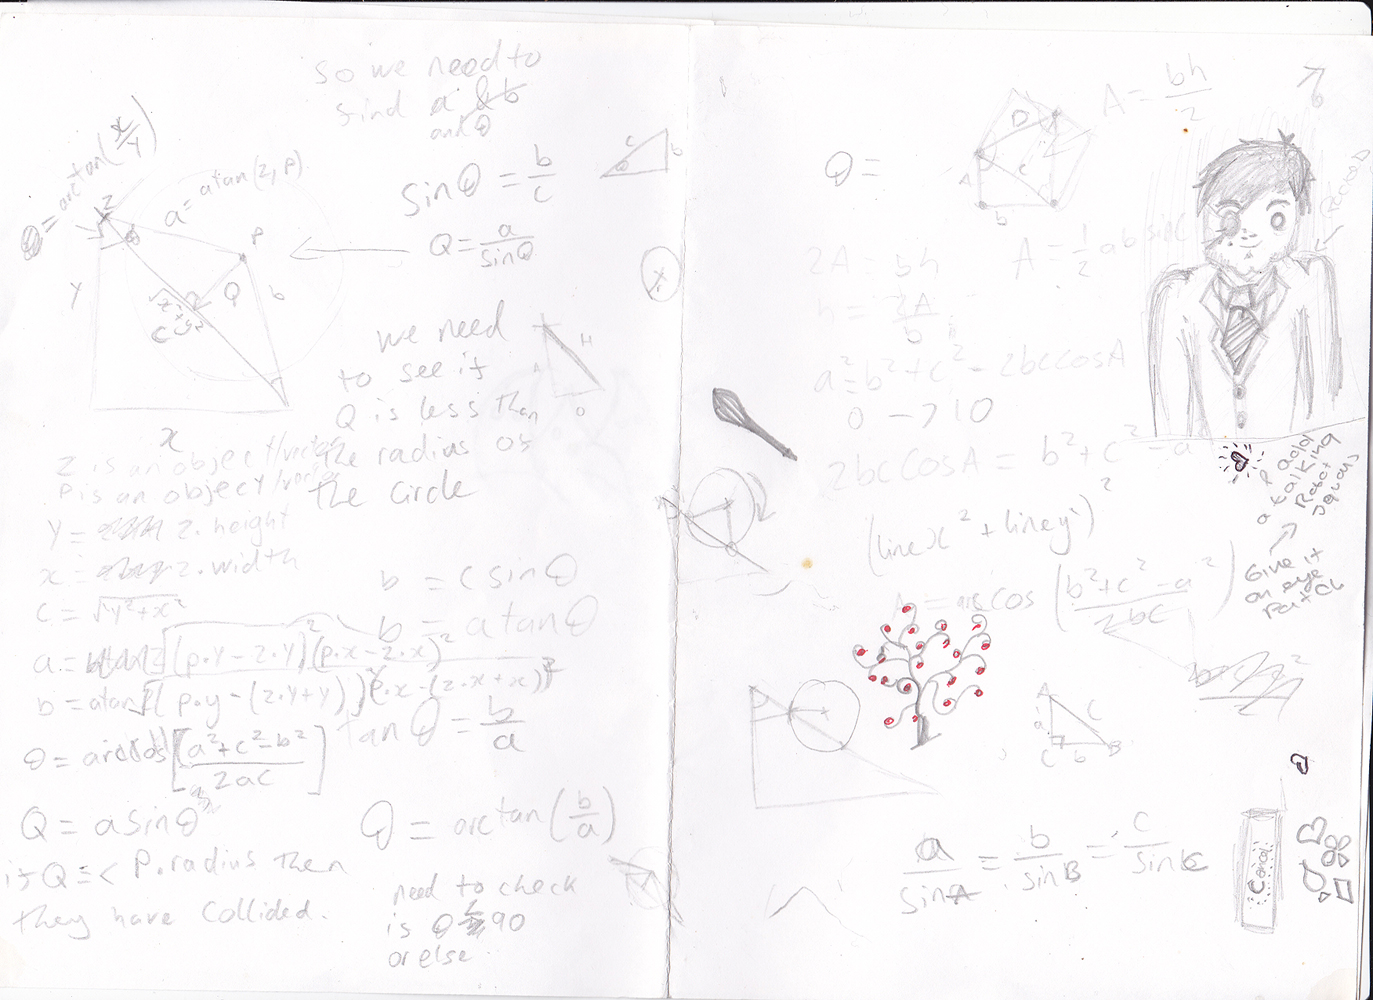
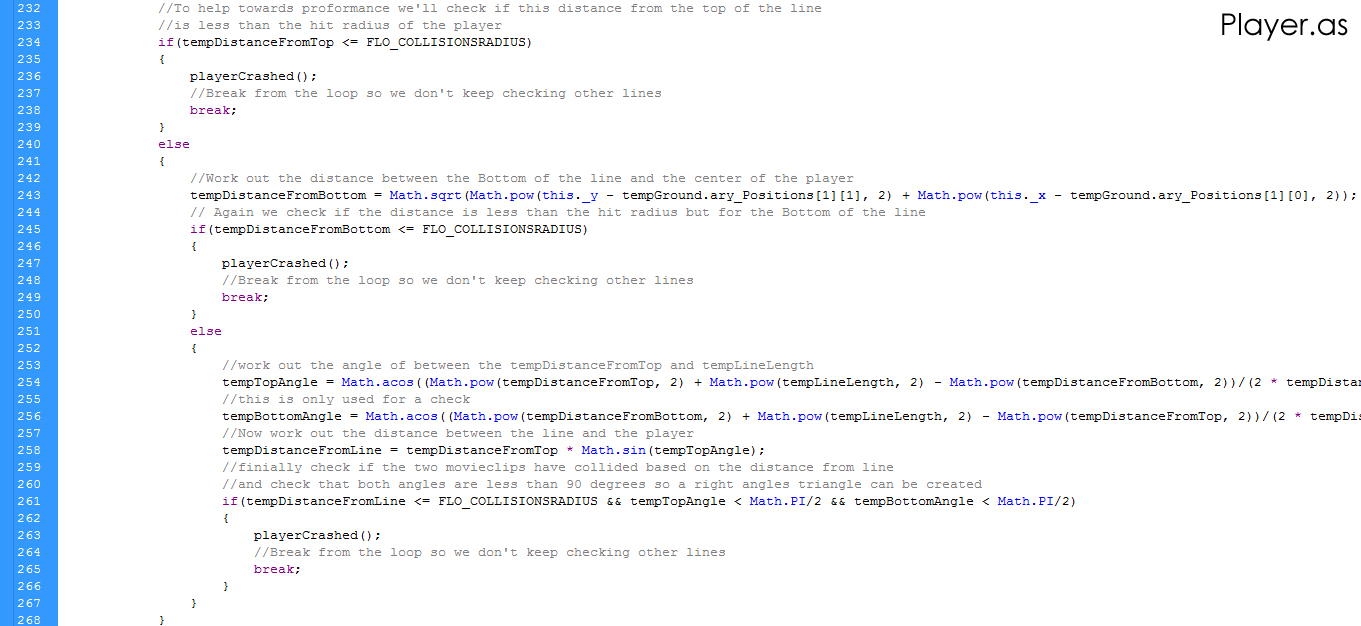
Next up, the collision checks between the land and the player. This for me was a big deal. I haven’t done collision for single lines before, only simple rectangle and circular collision checks. I tackled this problem by first getting a piece of paper and drawing/working out how I know if the line and the player had collided. After a few minutes I simply worked out that the line had to create a tangent or a segment to be colliding with the player. My first assumption was that I needed to check if the collision circle of the player and the line had similar coordinates. This system was flawed because of the number of calculation that would have to be done. My next idea was using the three coordinates I have (the start and end of the line and the player’s centre) to create a triangle. The height of this triangle would then be compared against the radius of the player’s collision circle. If the height was less than or equal to the radius, the two object had collided. To work out the height of the triangle I rearranged the cosine rule ( a² = b² + c² – 2bccos[?] to ? = arcos[(a² + c² – b²)/(2ab)] ) to find the angle between the top coord of the line and the centre of the player. I then rearranged sin(?) = opposite side / hypotenuse to opposite side = hypotenuse / sin(?). Putting these two together with all the values I have provides the height of the triangle. The only problem with this is when the player’s coordinates create an obtuse triangle. This means a right angle triangle can’t be made inside and thus breaks the previous formulas. I solved this by putting checks on the angles created making sure that they are less than 90 degrees. This does however create a blind spot which is corrected with simple distance checks from both the top and bottom of the line to the player. Below is my working which should help explain everything a bit more. Sorry that it’s a mess and for the random doodles by my sister. It’s my own fault for leaving it out on the desk -.- .
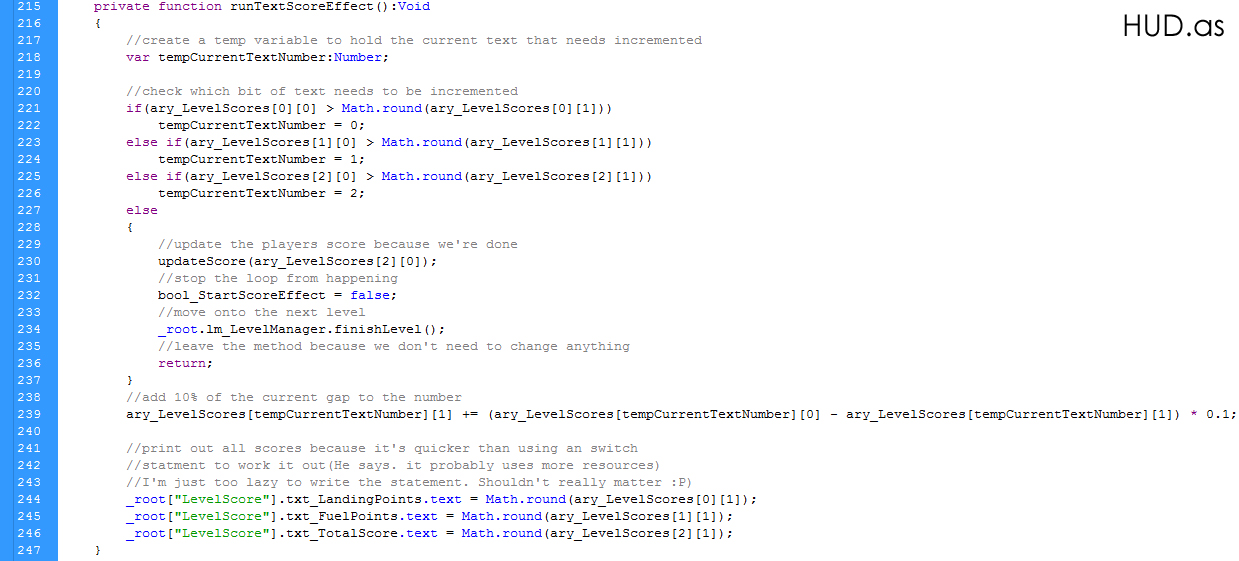
Now I had the basics and a playable version of the game set up, I moved onto creating the HUD. The HUD handles the start and finish of the game as well as keeping track of score, fuel and lives. I started off making a movie clip with a score counter, a fuel bar and little images of lives. Next I attached a new class to the movie clip and set up variables and functions to deal with the score counter, fuel bar and lives. I then realised I needed a score counter at the end of each level to show what the player had achieved. This was just another simple movie clip with text fields in that gets attached. I later added an effect to make it look as if the score was counting up. After setting the game over screen I wasn’t happy with everything just suddenly being on stage. This lead to making things fade in and out. Adding this in after I had completed the bulk of the code made everything a bit messier and I really should have thought about doing it in the beginning.
The last thing I didn’t was create the main menu, not really much code used for this I just set up movie clips with buttons in that called functions from the HUD. And, well, yeah, that’s about it.
Thanks for reading and sorry about any poor grammar. I shall hopefully see you in a months’ time :]